

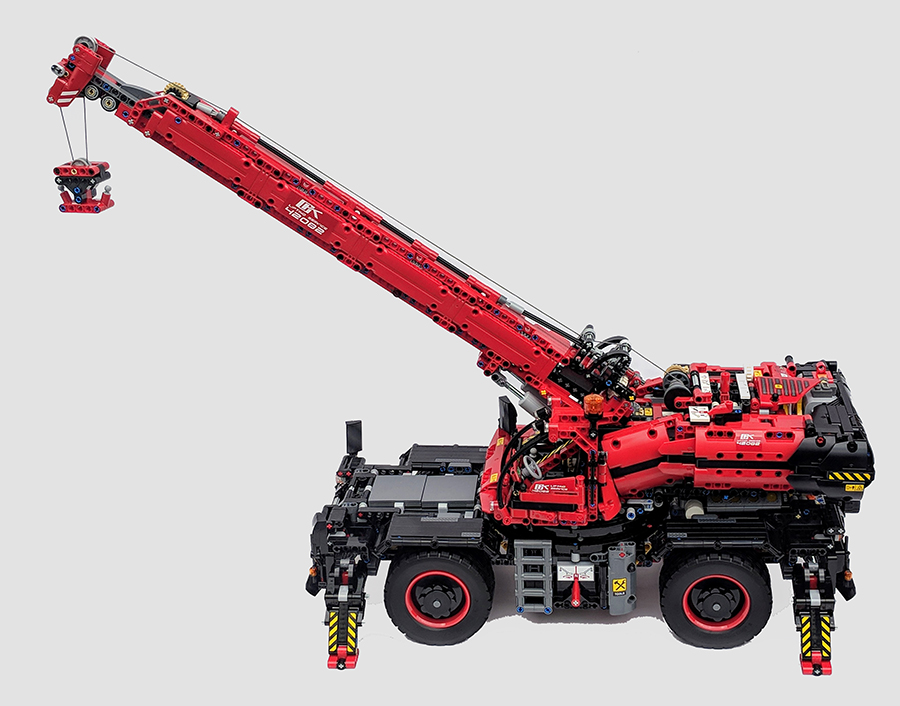
It’s time for the final set review of the Summer Technic releases. The Rough Terrain Crane is the largest LEGO® Technic™ set released to date, which makes it one big build. So big in fact it’s taken me a while to get it built and it’s been a nightmare to photograph. But I’ve finally finished it and just about managed to get a few decent shots of the incredible looking new set. Construction vehicles featuring heavily in the Technic line as they lend themselves nicely to the Technic build system and inspire much of the functional abilities of sets. So let’s see if tackling the Rough Terrain Crane was worth all the hard work and take a closer look at some of the sets extensive functionality.
Product Description
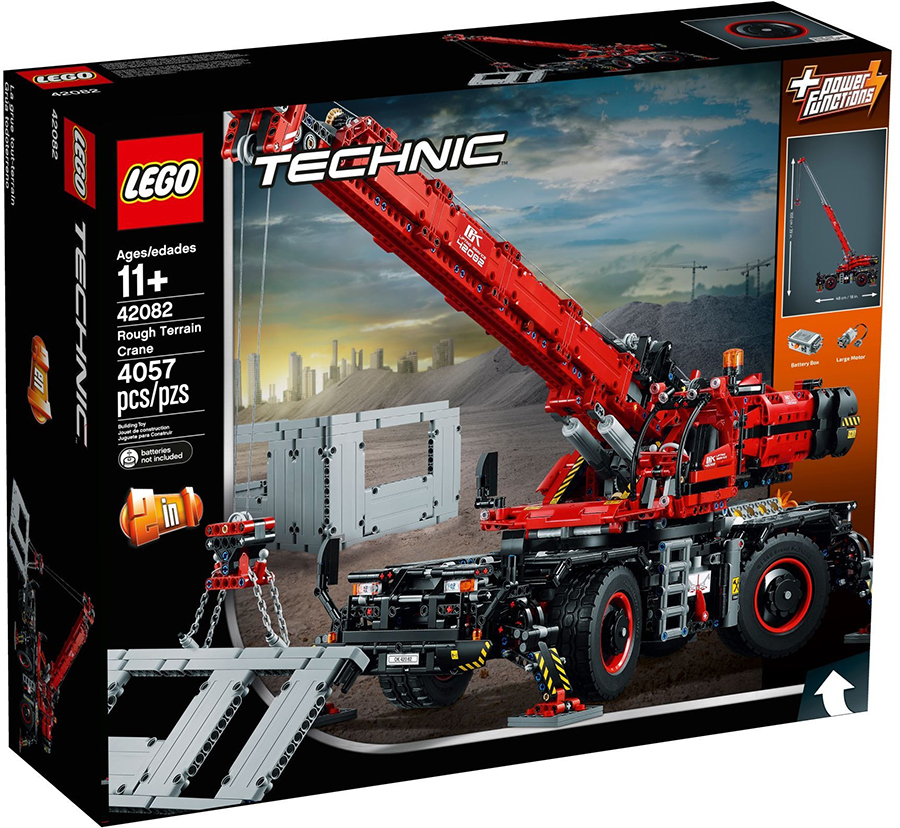
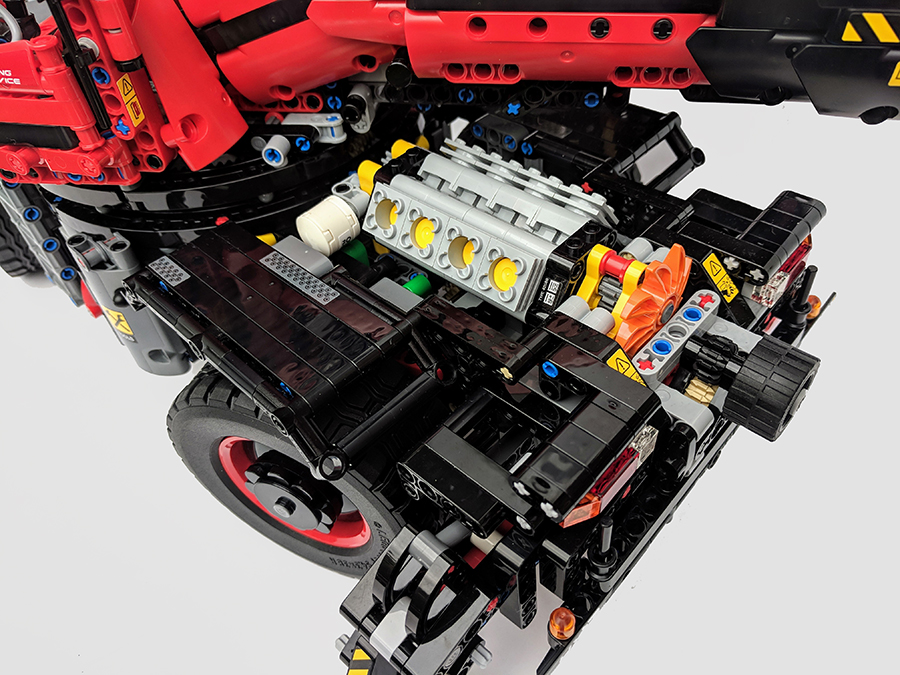
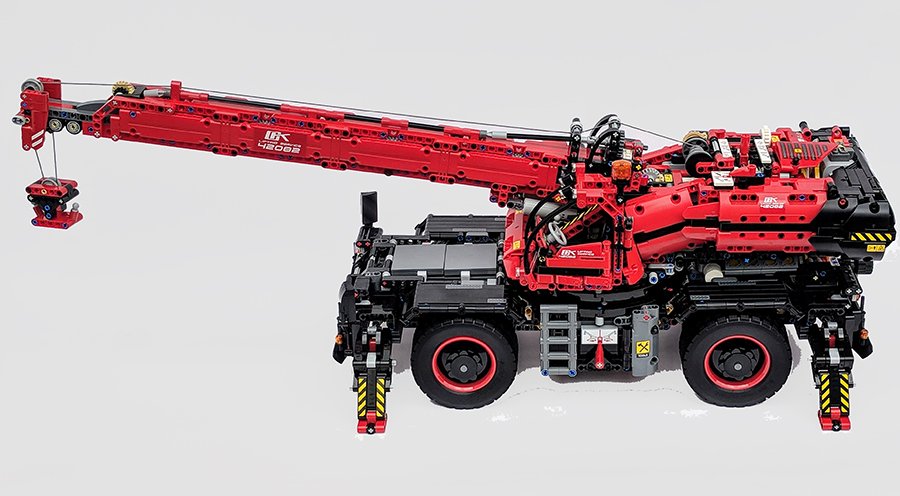
Enjoy an immense build and play experience with the LEGO® Technic™ 42082 Rough Terrain Crane, our largest and tallest LEGO Technic crane to date, pre-August 2018. Activate the Power Functions and select upper or lower crane mode for complete control over an array of easy‑to‑operate, motorized functions. Lower the stabilizer legs, rotate the superstructure through 360°, operate the lifting winch or send the extendable boom a meter into the air. Manual functions include 4-wheel steering, 4-wheel drive, detailed V8 engine with moving pistons and fan, and adjustable wing mirrors, plus a detailed operator’s cab with an opening door. This amazing model also includes 2 opening compartments with tools, chains and a fire extinguisher, plus 4 outrigger landing plates and 4 LEGO Technic building sections that can be lifted and assembled. This 2‑in‑1 LEGO Technic set comes with a red and black color scheme and can be rebuilt to create a Mobile Pile Driver.
- Set Name: Rough Terrain Crane
- Set Number: 42082
- Pieces: 4050
- RRP: £229.99
- Measurements: over 100cm high, 66cm long and 26cm wide in working position, and over 27cm high, 76cm long and 20cm wide in driving position.
- Availability: Exclusive to LEGO Brand Retail Stores & shop.LEGO.com
The Build
Fuelled by a mixture of intrigue and dread, I cracked open the huge box to be greeted by seemingly endless bags of Technic pieces, two whopping instruction booklets and another smaller sealed box, also filled with even more bags of elements. As one of the largest Technic sets released to date, it was only expected that it would be heavy of parts, thankfully the bags are numbered. With so many bags, having them numbered is a really helpful feature, especially if you’re light in space to build. I know there are those who like the traditional method of non-numbered bags, but it’s just not practical with a set of this size. The entire set has five clear stages to the build, the base, the central platform, the crane boom arm, the cab and the partly build building walls. As with most Technic sets, the build begins with the inner workings of the base.
There is a lot going on with the innards of the crane, all the workings for extending legs, steer system and engine are all built within the chassis of the crane, and all are linked together. Despite that, although I’ve not built many Technic sets, those I have can be a little tricky to build due to masses of gears and dials, this set isn’t that complex. Although there were a couple of instances where I missed steps or placed things incorrectly. This is more to do with the instructions, some sets I’ve built in past, have had the elements which need to be placed, highlighted within the build, something which would of been extremely useful with a set of this size.
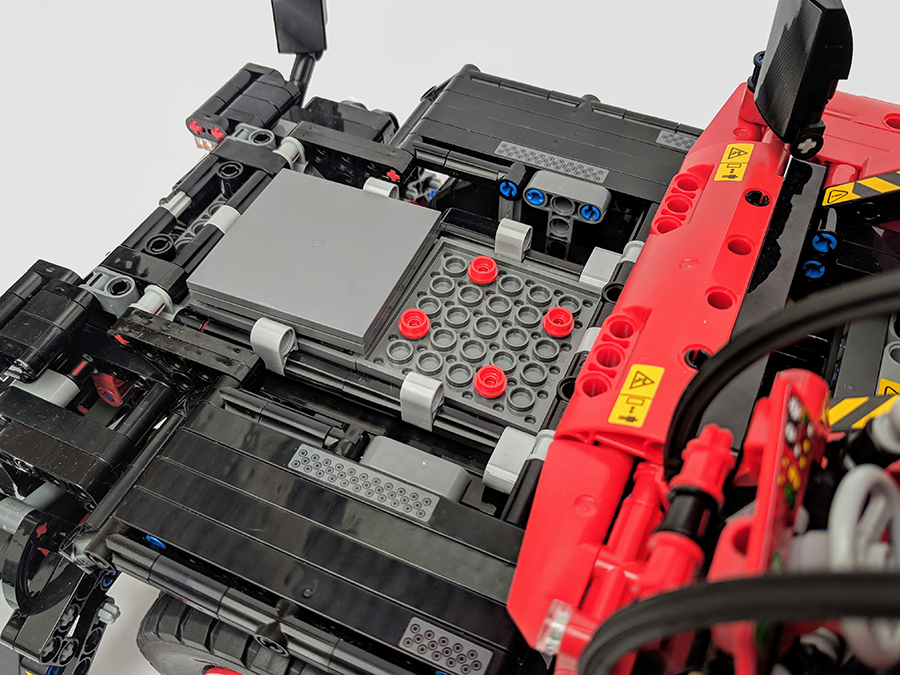
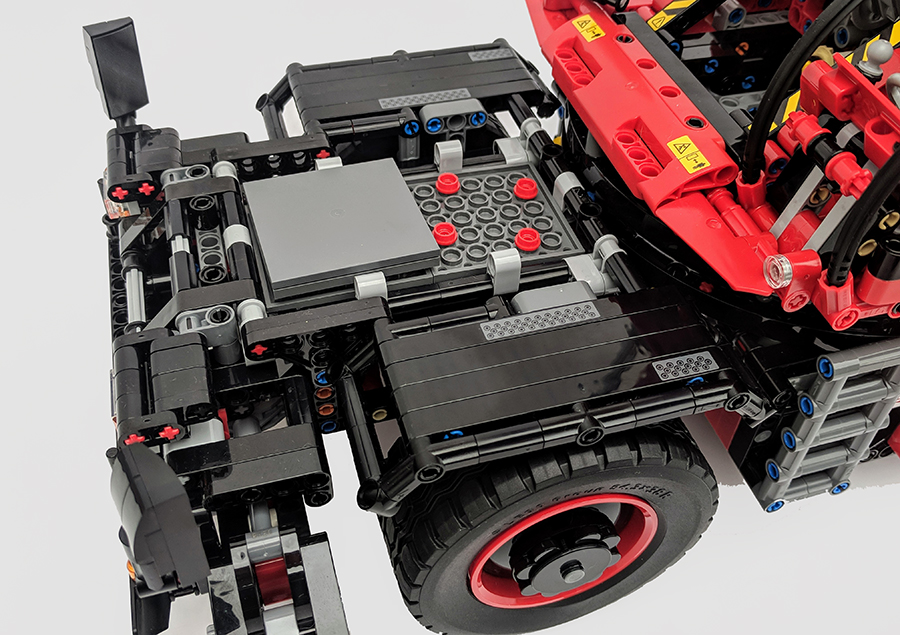
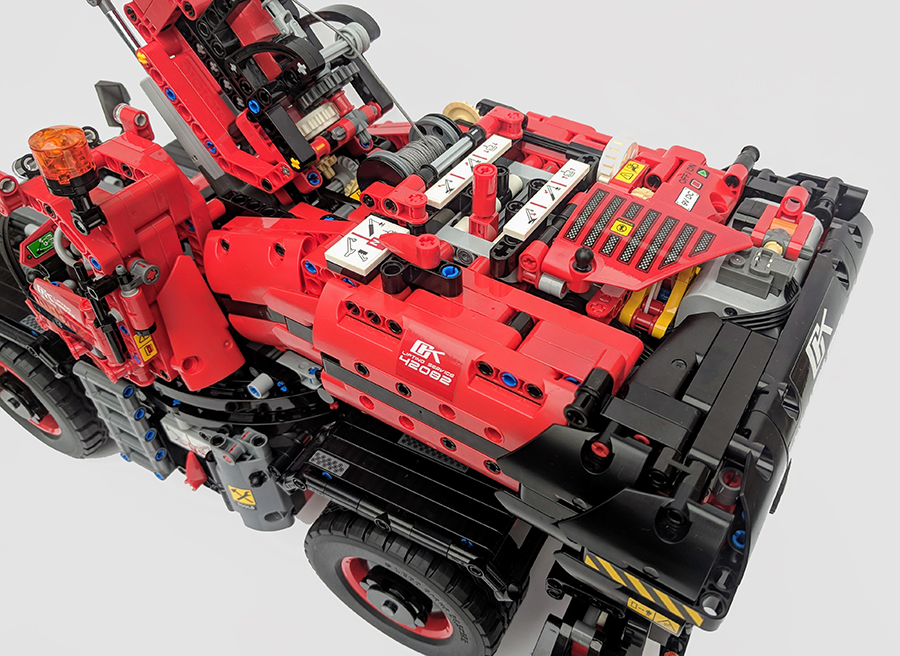
Once the base is complete, you then start on the central platform, which connects to the base via the large circular track built into the base. The platform looks a little sparse, but the majority of it is made up of the boom arm, operators cab and plate detail added on towards the end of the build. The set is far too big to detail all aspects of the build, we’d be here forever and to be far it would be a boring read, instead I’ll focus on the functional aspects of the set as they are the most fun parts. I will say that the build is fun and will keep you busy for a fair few hours.
The Functionality
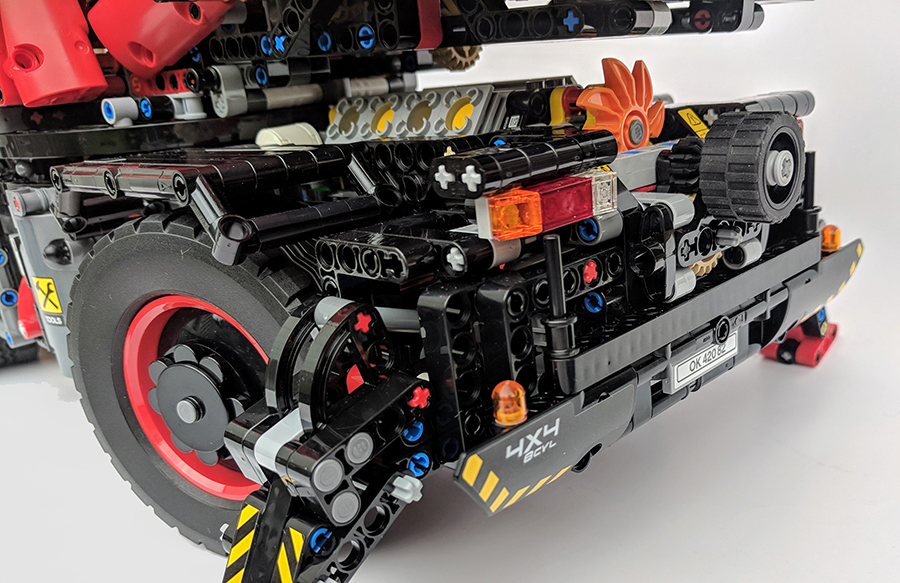
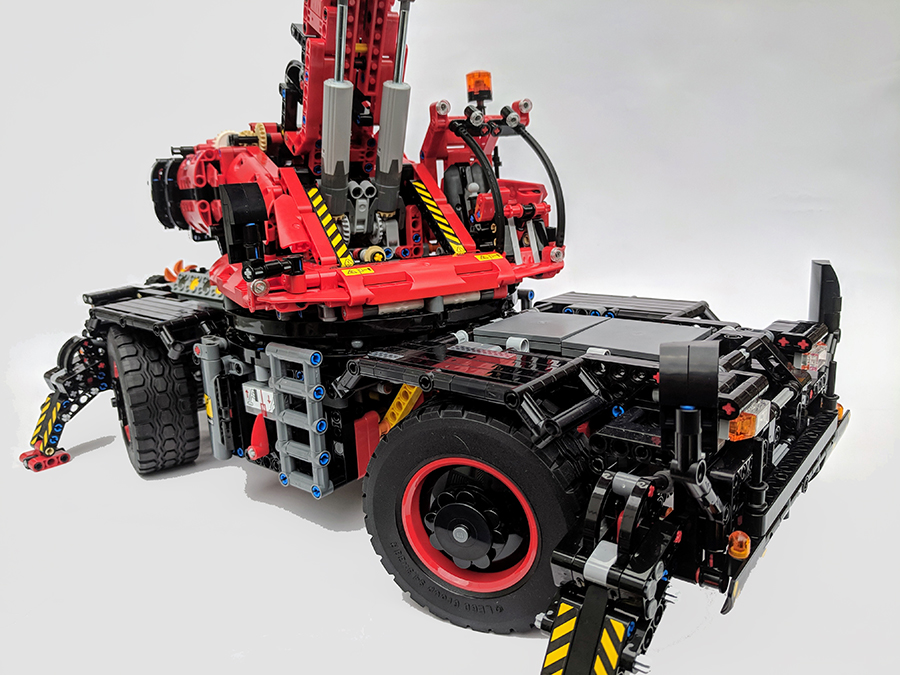
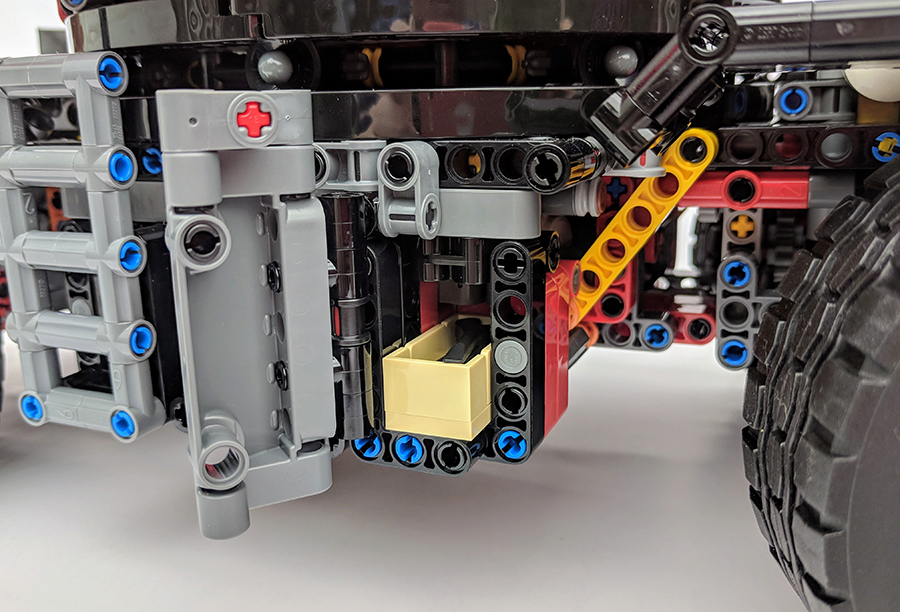
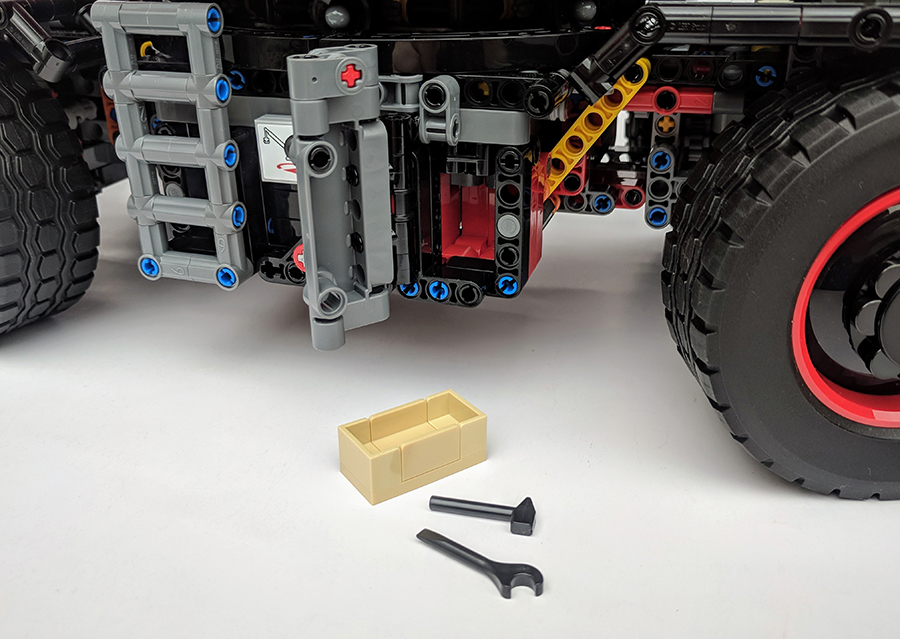
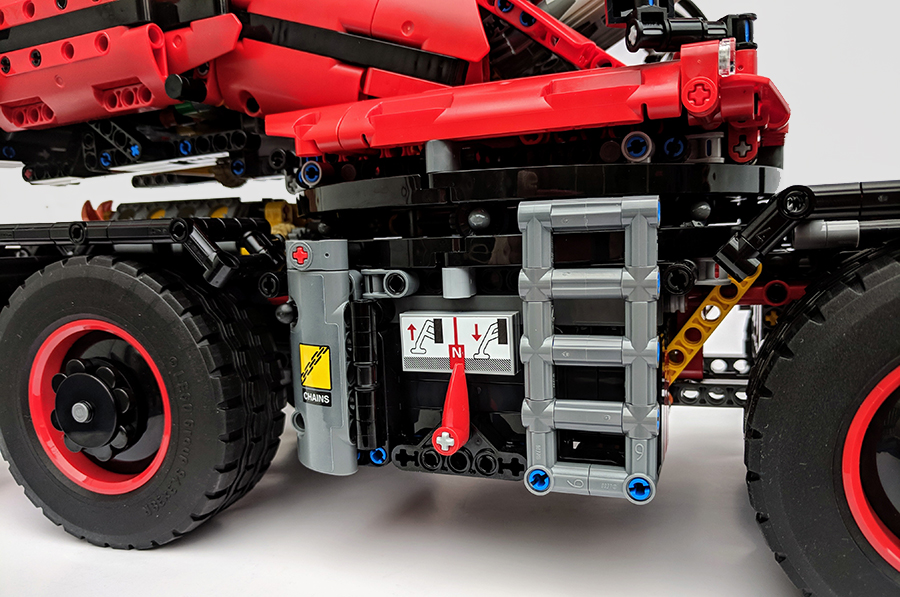
At over 4000 pieces, you’d expect the set to have an array of functional elements and it doesn’t disappoint. There’s a number of manual functions along with an intricate but not complex Power Function-powered system of movement. On the manual side of things there is a basic steering system, which is controlled by a lonesome tyre on the very rear of the crane, this turns the both axels in opposite directions for easy turning of the chunky tires. When those big wheels turn, they also provide movement to the 8 cylinder engine. You can also access basic tools in little boxes inside compartments, located either side of the cranes central platform. These have a Technic plate, which can be opened to reveal a set of additional chains and tools.
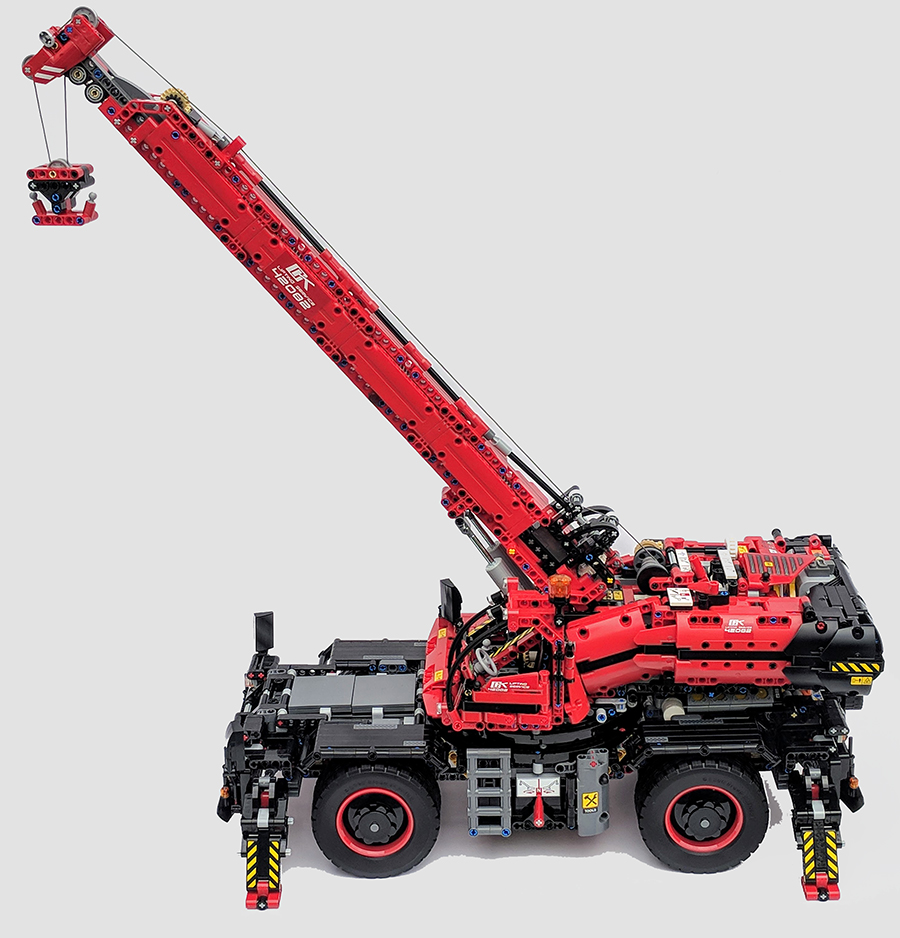
But the sets most impressive features are those that are powered. A large Power Functions motor provides the necessary juice to power a number of automated movements, many of which you’d expect a crane to do. One of the best of the best of the powered features is a set of four stabilizer legs. These are located on the large base chassis of the crane and can be deployed by a switch found on the side of the crane. With the motor running and the switch on the top of the crane set in the left direction, flicking the switch on the side, allows the four legs to extend at the same time. The motion of the legs slowly extending is great. Flicking the switch in the opposite direction, recalls the legs in an equally smooth motion.
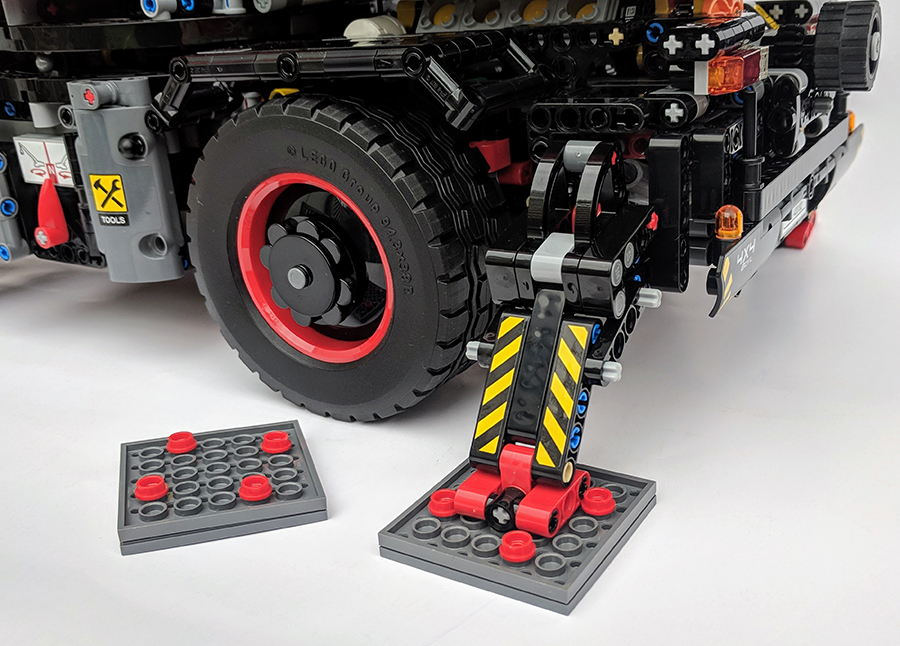
There are also four removable plates with four perfectly placed studs, there can be placed under each of the four extended legs. With those studs framing the feet of the legs. When not in use they are stored in the front section of the cranes base. They are a nice addition to the set, especially has they are not really necessary. But just like the additional tools and chains, the stability plates would be something the real world vehicle would have.
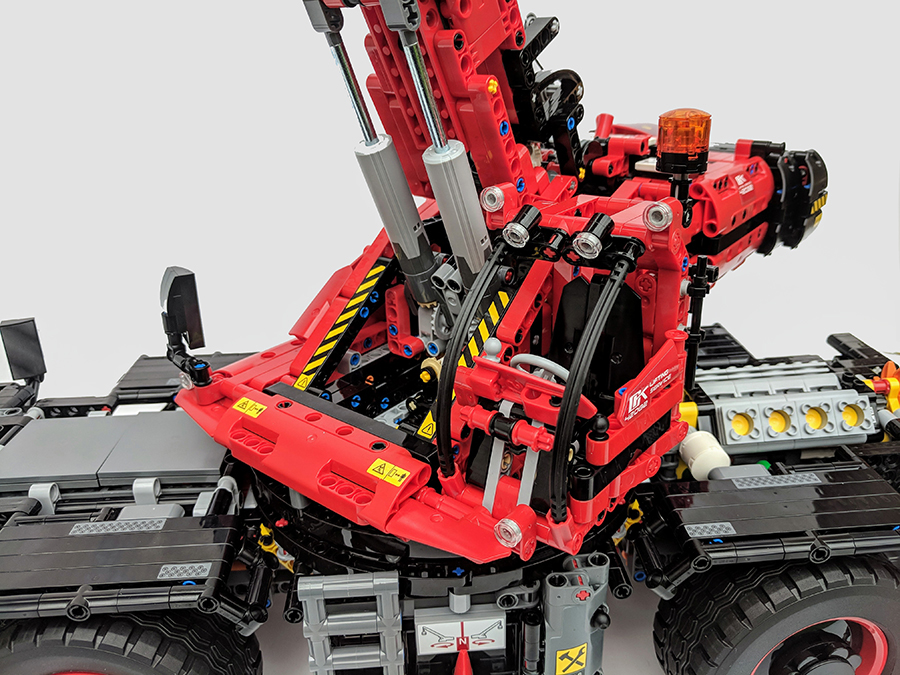
There is another switch located on the opposite side of the leg extension switch, this allows the cranes central platform to rotate in a full 360° circle. Depending on how the crane arm is angled and extended, thanks to the sets immense size, the cranes turning circle can be impressively large. That central section is quite weighty, so the fact a single motor can rotate it with ease is quite impressive, not to mention its also a smooth motion.
The final powered functions are the most complex, they are controlled by a series flick gear powered switches. These are best described as a gear box, like you’d find in a car. The Rough Terrain Crane version features a single switch handle and six gear notches. A ‘charge-over catch’ is mounted on a rod which sits above a trio of ‘gear shift connectors’, moving the switch causes the those connectors to move, which then causes various parts of the crane to move. It sounds complex and looks complex, but it wasn’t that complex to build, which I really liked. In fact it was so nice to put together, compared to other Technic sets I’ve built in the past, I thought I’d missed something as it didn’t look like what was there could power five different points of movement.
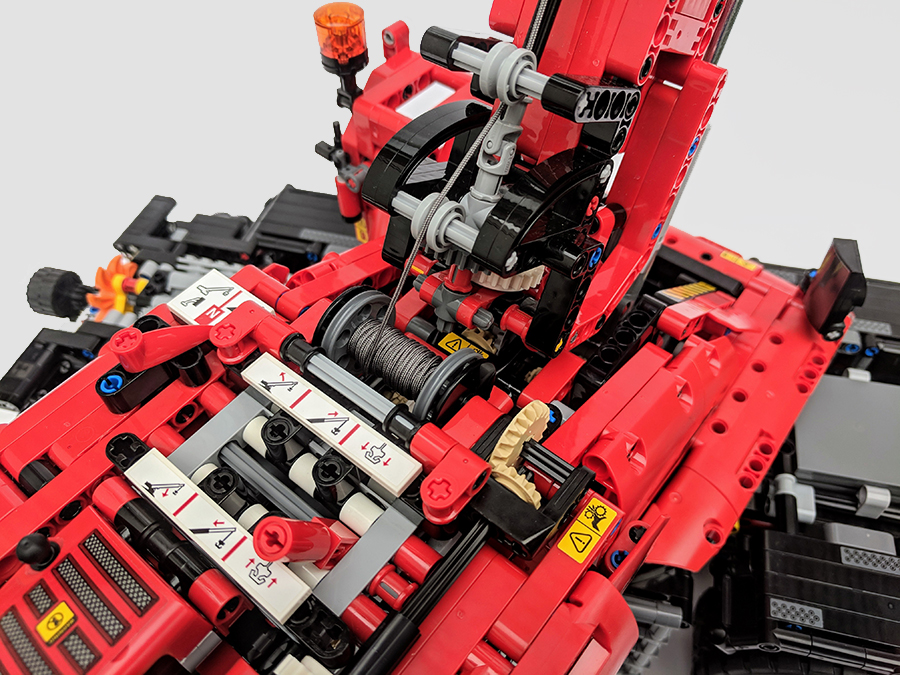
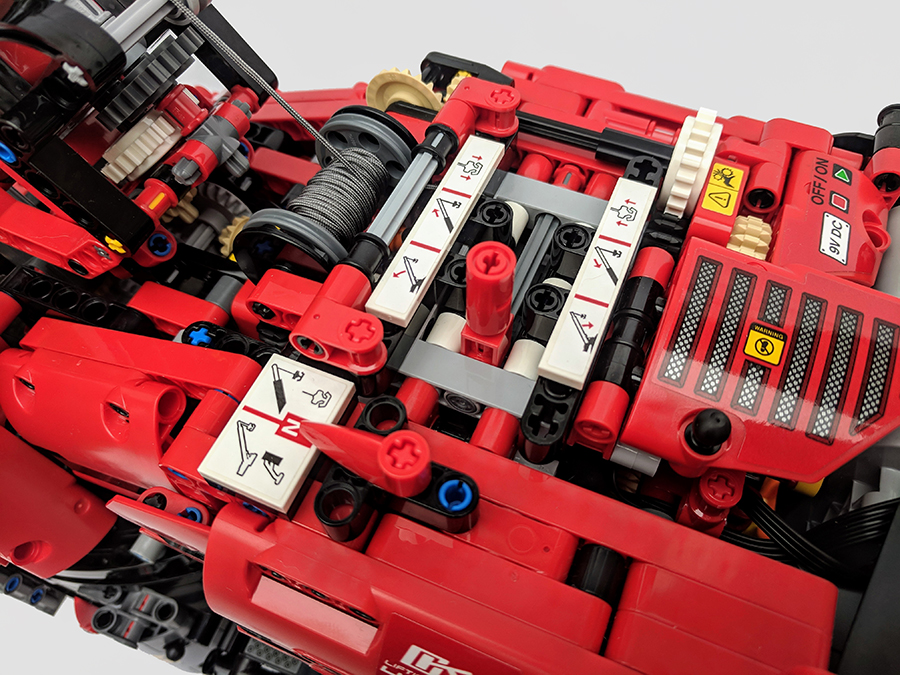
As well as the the gear switch, you’ll also notice a second two-way switch, this flips the motors controls between the upper functions and the lower functions. So flipping it to the right, allows the boom functions to work. Switching to the left, allows the lower functions to work. All of which are clearly labelled via the power of stickers.
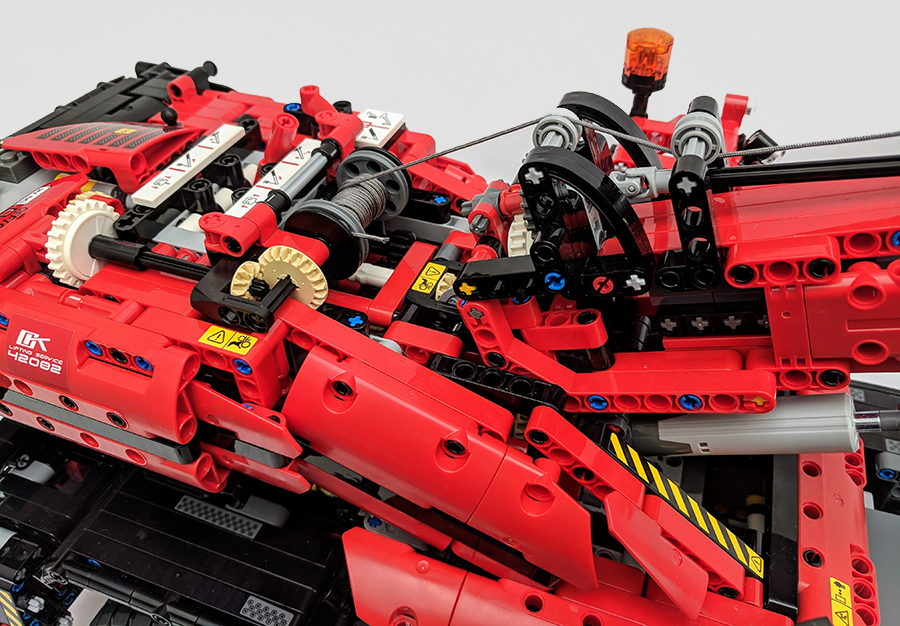
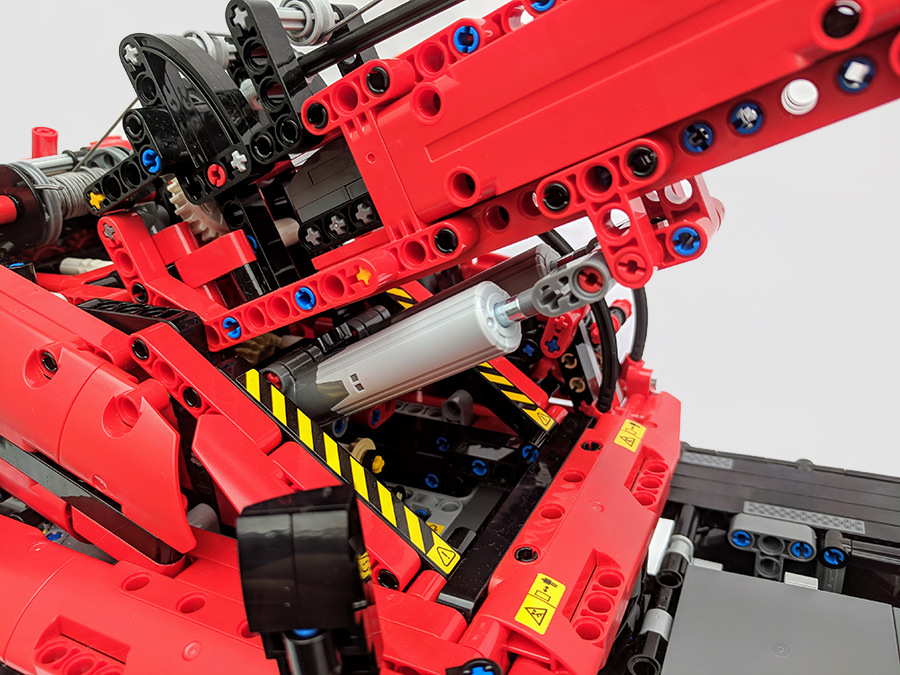
A mixture of gears, pistons and thread combine to create the connection between the main body of the crane and the boom arm. The boom arm actually takes up quite a lot of the build. The central section of the boom is housed within a large stripe of flat panels. I accidentally put the end gear wheel on the wrong side which resulted in the stickered switches working in the opposite direction, thankfully it was easily to correct, unlike the gear issues I had with the original Volvo Wheel Loader set, which resulted in completely stripping the set back to the beginning. When building a Technic set make sure you double check every step you build. This will help in the long run, as you really don’t want to being taking the set apart for a missed pin or incorrectly set gear.
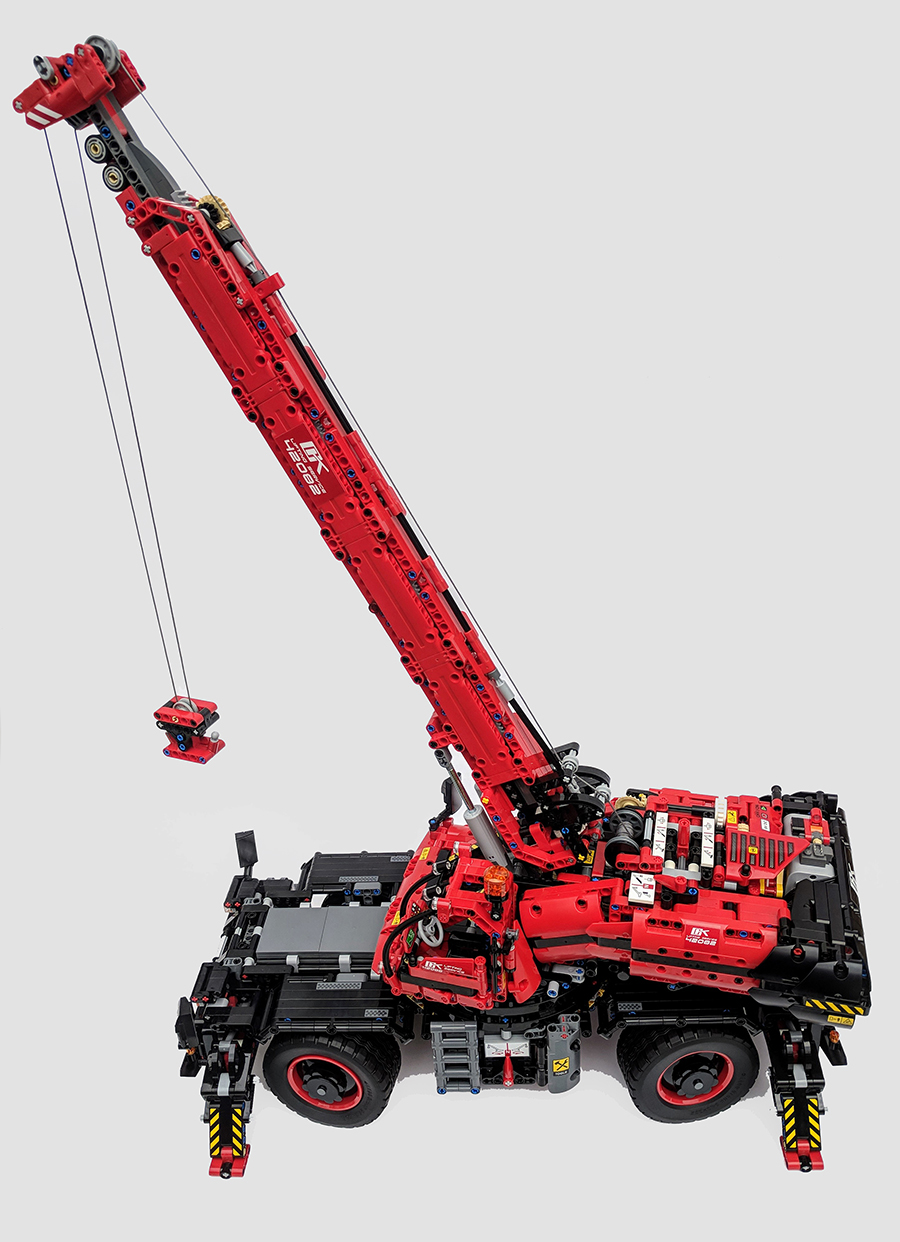
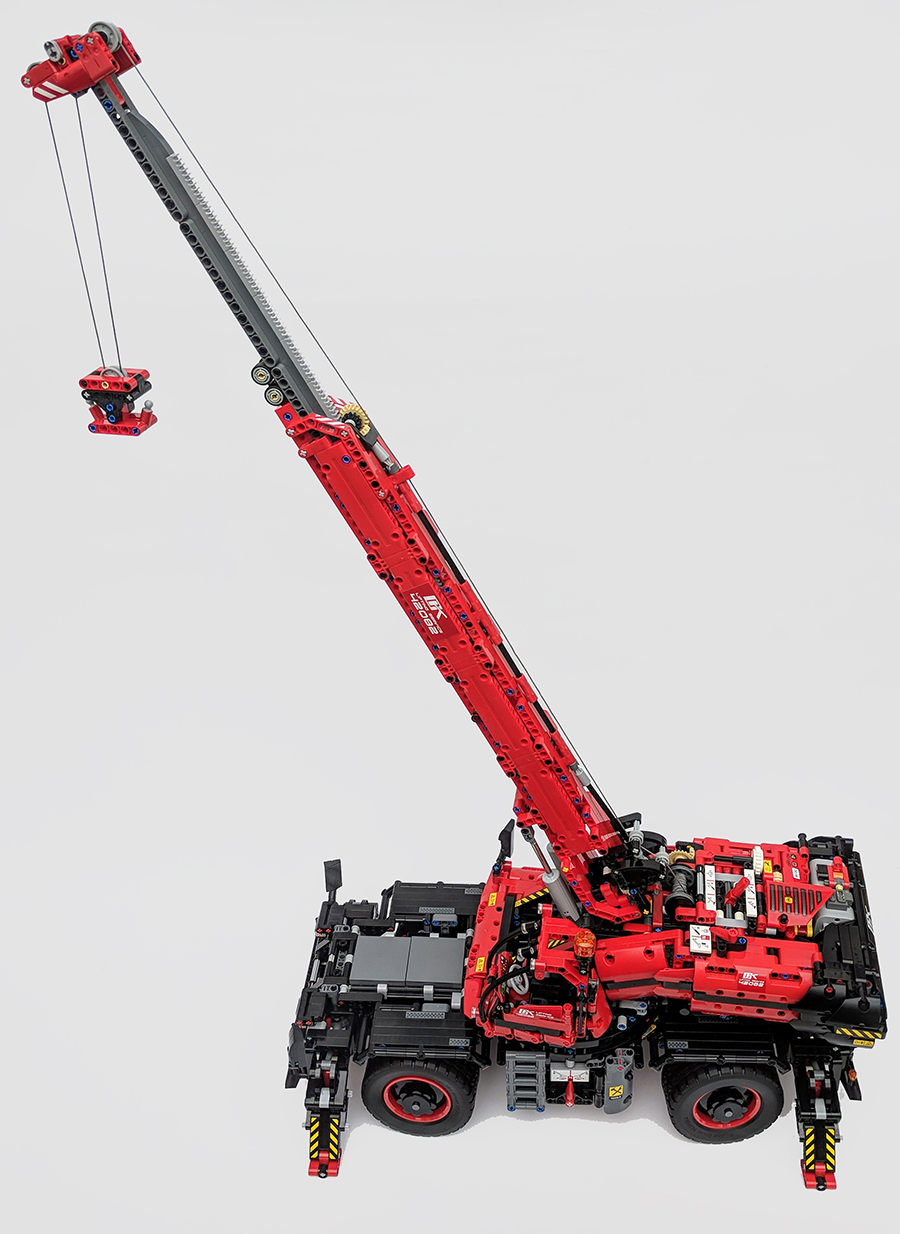
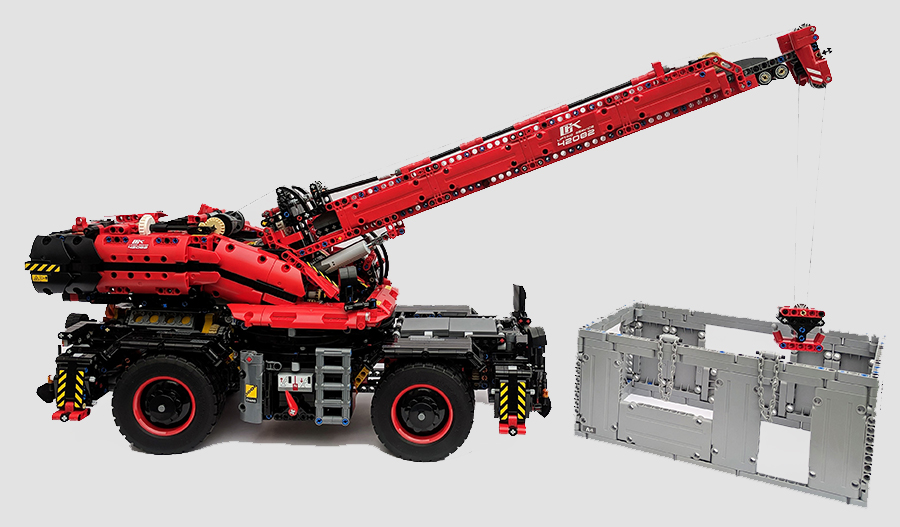
The boom arm can be lowered and raised, the jib can also be extended to almost double the length of the boom. When LEGO say its the tallest and largest crane to date they aren’t joking. The hoist rope can also be lowered and raised, thanks to a series of gears built into the lower section of the boom, these link up with the main gear system in the base of the crane. The whole thing is basically a slightly simpler version of a real world crane, it’s has all the functions and movements of an actual crane, just built with LEGO elements instead of steel and iron. Which is what makes these large scale Technic sets so impressive.
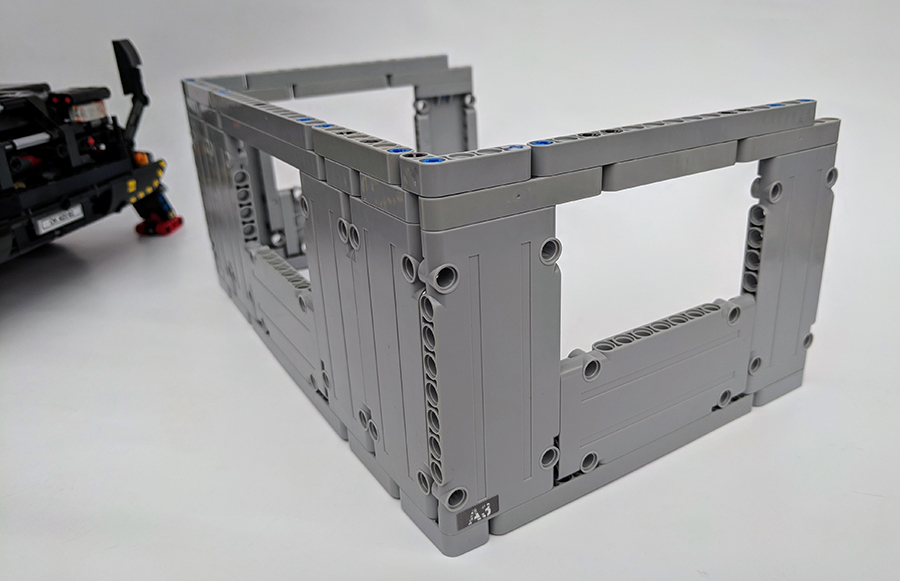
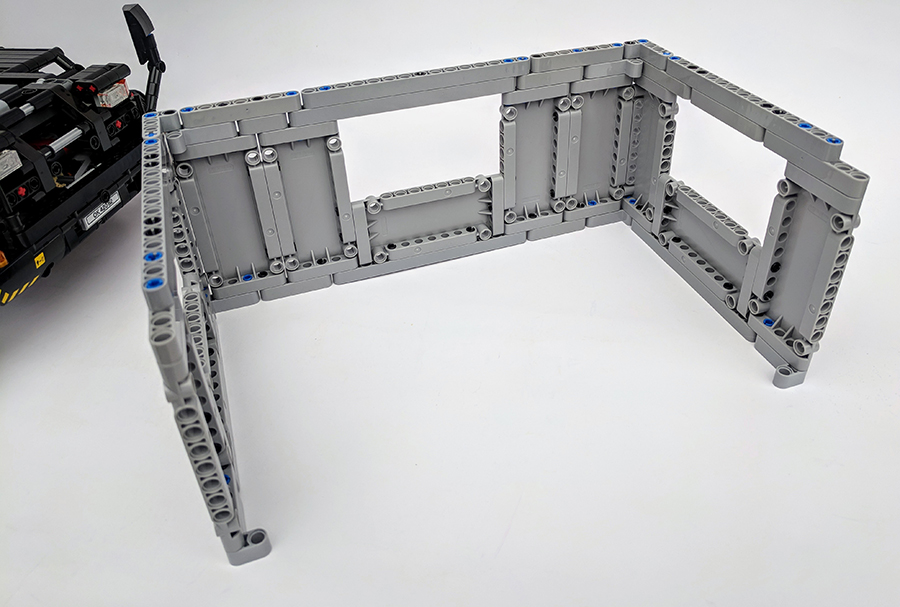
A crane needs things to lift and the set doesn’t disappoint. It includes four walls made from a mixture of Technic plates and beams. The walls can be connected together, although they can easily fall apart, but the main reason they are included is to give you something to lift. One of the walls has a chain connected to it, which allows you to connect it to the cranes hook and lift with ease.

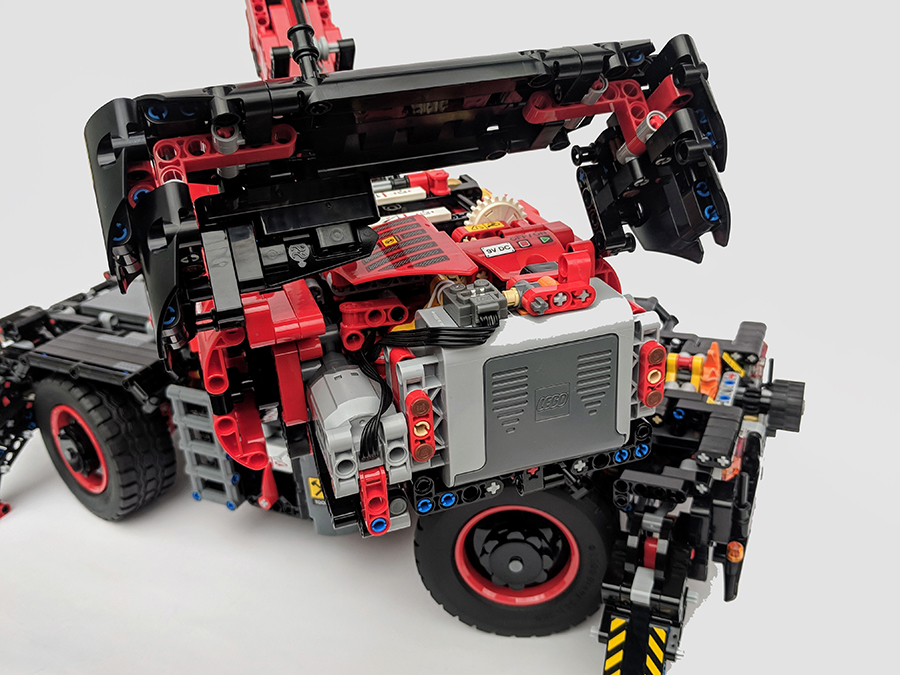
The whole thing is powered by a large motor and battery box, these are from the original Power Functions system and not the new Powered Up system. It will be intersting to see how the new powering system is integrated into the Technic range, especially due to Powered Up’s differing connections and app-connected control. Both the battery and motor is hidden beneath the black rear section of the main body, which flips up so you can easily change the batteries, I wish LEGO would introduce a rechargeable battery pack as standard, using 6 AA batteries can become an expensive game.
Overall
I was expecting the set to take a while but I was also expecting it to be really complex and frustrating to build, it was none of those things. The gear system is a genius use of parts and engineering. The final model is a beast, it’s huge and has some amazing functional features. I still think the Volvo Concept Wheel Loader is my favourite Technic set I’ve built so far, but the Rough Terrain Crane is an extremely close second. As with other Technic builds the Rough Terrain Crane can be built into a second model, the Mobile Pile Driver. Instructions for this B-model can be found on the LEGO Technic website, where you can also watch a video detailing some of the main sets, impressive functions.
This set was provided via The LEGO Group for the purposes of review. The thoughts and opinions of the set reflect those of BricksFanz and not that of the LEGO Group.


29th December 2018
Having finished the model all upper functions work but the turntable and the four legs do not work when the appropriate switch is deployed help ?
29th December 2018
Check you have the gear wheels the right way around, I had one the opposite way and it caused elements not to work correct, could be the issue
23rd July 2019
i built the pile driver but have lots of parts left over and my son got to them now missing some how many ports should there be left thanks
23rd July 2019
It’s been so long since I built it I couldn’t say I afraid. Should only be a few small elements though
2nd August 2019
Hi Adam, I am building this (first two stages done now). I wonder whether something is working correctly, perhaps you can tell me. The wheels are not yet installed, but the axles are. If I spin one “wheel” in one direction, the one on the other side spins the other way around. If I take both wheels on the front end in my hands and spin them in the same direction then all wheels do spin one direction.
Do you have it too, that if you spin one wheel (either front or rear) in one direction that the other wheel spins in the other direction? Or have I made a mistake somewhere? Thanks.
2nd August 2019
It’s been a while since I’ve built it but I think they are meant to spin in the same direction. I had that issue with the Volvo crane though and had made a slight error, so sounds like an element made be in the wrong way. Sorry I can’t be much more help
2nd August 2019
Thanks for your quick response. I also got the feeling that something is wrong and it is better to restart building now than when it is entirely finished.
2nd August 2019
Definitely I got to the end of the Volvo crane and the wheels spun in different directions. I had to complete strip it down as the gear system was in the chassis, this happened twice! Technic sets are great but unforgiving if you make a tiny mistake, which kinda makes them a little cooler. Let me know how you get on!
2nd August 2019
Well, the thing with this one is that it does not ride itself and when I turn the wheels in one direction that does seem to work (not blocked), so it doesn’t seem to be an issue that would prevent its functioning. But it is still weird that spinning one wheel leads to the other wheel spinning the other way.
2nd August 2019
I am guessing it may be ok. If I spin one wheel, the least resistance is the small cogs (in the differential), which are probably for being able to have the wheels spin at different speeds in corners. If I spin both wheels (front or rear) at the same time, the large cog (differential) is used. I can imagine that it is logical that the small ones have to do something different from the large one to enable the differential.
https://images.app.goo.gl/VukiSwhy8mGQqTcR8
11th September 2019
Great review, currently having some issues building this, when we try and raise the crane the ‘extenders’ just click and don’t seem to raise the crane, also there the switch for choosing the upper and lower functions, doesn’t seem to connect to anything, and find there is instead a switch on the side hidden by a panel, any advice, or is it a case of taking the upper part of a starting again …….. which would be fun but take a while.
11th September 2019
Yep its just a case of triple checking you have all gears and elements in the correct place and facing the correct way.
19th December 2019
My son is building the crane. He’ at the end of booklet 1 and found the crane can ‘t ride. I guess he wil have to dissassemble and start all over again. Or is that normal and the crane can only ride when motor driven?
19th December 2019
It’s been a while since I built it but I only tried the Power Functions when built. The wheels should move once the base is built but all the other functions require different parts of the crane.
6th January 2020
Great feed this one, my boy has similiar issues that James posted on the 11th September. The switch for choosing the upper and lower functions, doesn’t seem to connect to anything? Its the second two-way switch, this flips the motors controls between the upper functions and the lower functions. Everything else works apart from any lower functions. Any thoughts or do i tell my son to take the whole top section apart or is it the lower section where the problem could be?
6th January 2020
It’s a tricky one, it’s been so long since I built it. Once the while thing is built, you can go through in stages to see if there are any issues. It may mean taking some bits apart but not completely stripping it down.
18th January 2020
Hi Adam managed to resolve the top switch issue but the lower functions dont work. I notice that there is a post on here about this and you replied “Check you have the gear wheels the right way around, I had one the opposite way and it caused elements not to work correct, could be the issue”.
Which section should i be looking at please mate as i am baffled. Looks like you are the person to talk to!!!
18th January 2020
It was the gears in the arm of the crane, the ones near the base of the crane if I can remember rightly. Just triple check with the instructions and also make sure they are clicked on fully
22nd March 2020
I am just to the end of part 1 of the rough terrain Crane . I have small pieces left over . But , I am missing a needed,part ..
I am in a confined area , have looked , but still missing a part ..
WHAT DO I DO NOW ?
Can someone help me ?
22nd March 2020
Sometimes elements do slip through the check process and are not included. It’s very rare, you can either double check you haven’t used it in error during the section you have built or if it’s definitely missing, you can request it free of charge from LEGO.com. Just head to the Service section and fill in the missing pieces form.