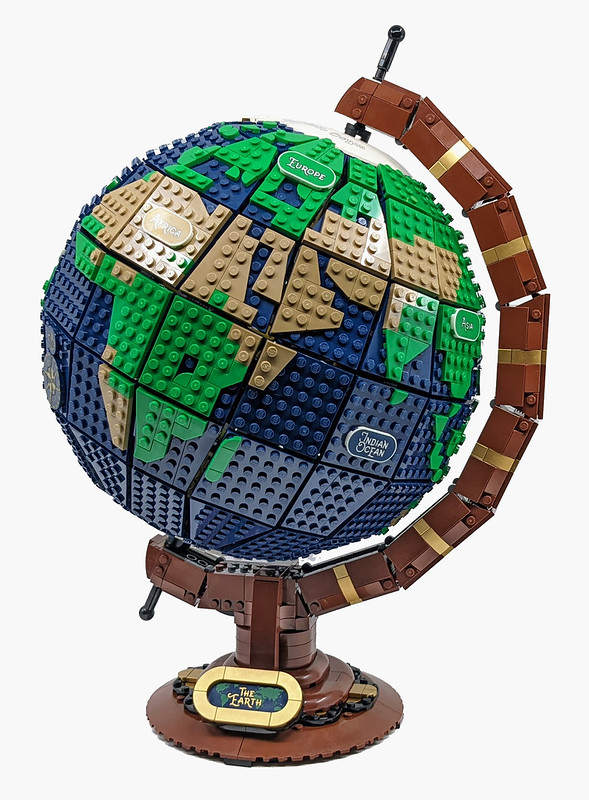
The LEGO® Ideas theme reaches an important milestone as it gets ready to welcome its 40th set. Across the past 39 sets, LEGO Ideas has gone from a series of predictable sets, limited by pricing and piece count to wildcard which could literally turn any idea into the next must-have LEGO set. This has certainly been the case with such sets as The Maze, Ship in a Bottle and the Typewriter. But the set I’m taking a closer look at today is the most ambitious yet. By the nature of their construct, LEGO elements aren’t best suited to creating curves, let alone a completely spherical brick-built recreation of a globe. But the original creation by fan builder Guillaume Roussel inspired the LEGO Ideas team to give it a go and the result is set 21123: The Globe. But can LEGO bricks really capture the style of a miniaturised recreation of the Earth? Let’s find out in my review of the 40th LEGO Ideas set – The Globe.
Product Description
Where do you want to go today? Dream of your next travel destination as you build The Globe (21332). Created by a fan-designer and brought to the world by the LEGO® Ideas team, this display model recreates the spinning movement of a vintage Earth globe with the help of LEGO Technic™ elements and features glow-in-the-dark tiles decorated with the names of continents and oceans. There are buildable ship and compass icons, plus ‘The Earth’ nameplate to complete a charming centrepiece to enhance the decor of any home or office.
Travel without moving
A journey of 2,585 pieces starts with a single brick, and illustrated instructions are included to guide every step of your building adventure. This collectible model makes the best gift for yourself or travel-loving friends.
- Set Name: The Globe
- Set Number: 21332
- Pieces: 2585
- RRP: £174.99/$199.99/199.99€
- Measurements: Length: 30 cm (11.5 in) Width: 26 cm (10 in) Height: 40 cm (16 in)
- Availability: LEGO.com & LEGO Stores
The build is split across 14 steps, which all feature a single bag of elements apart from step 1. There are no stickers, with all graphics detailing achieved with printed elements and not just any old elements, they are glow-in-the-dark pieces. The instructions offer a brief introduction to the set and a focus on both the fan designer and Design Team members who created the set. I really enjoy these aspects of the instructions as they make it feel more like an event as well as provide interesting details about what you are about to build.
A globe is a marvellous thing, once the staple of ornate studies and classrooms, they helped to scale the vastness of our planet into a far more manageable item. Although they have since been superseded by digital maps you can access in an instant, nothing really helps to depict the Earth as it is seen from beyond the stars. Even if kids today are more familiar with tapping a screen to see where North America is or where the Indian Ocean sits, they can see a globe and should hopefully know what it represents.
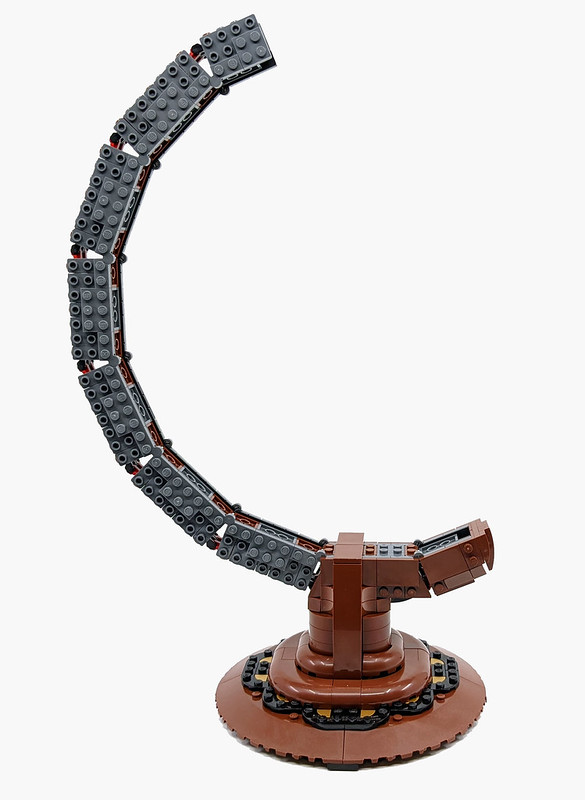
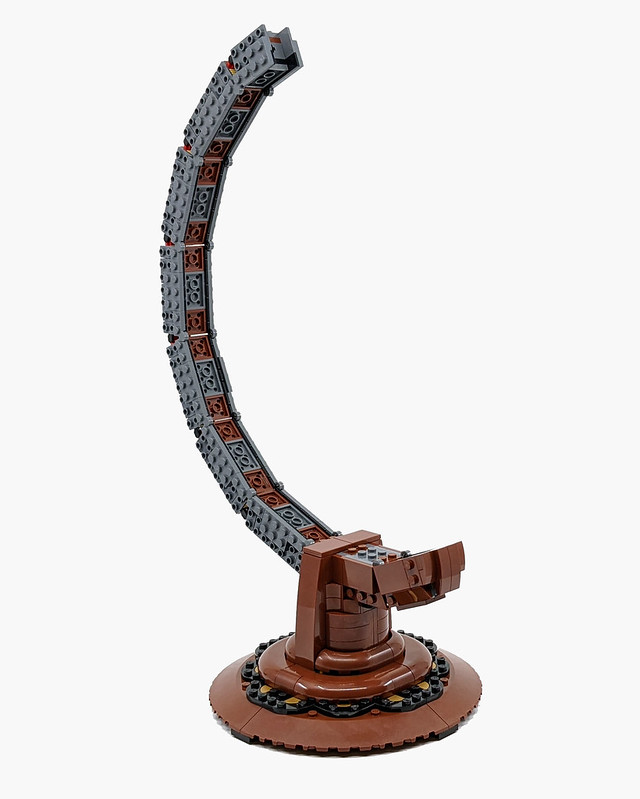
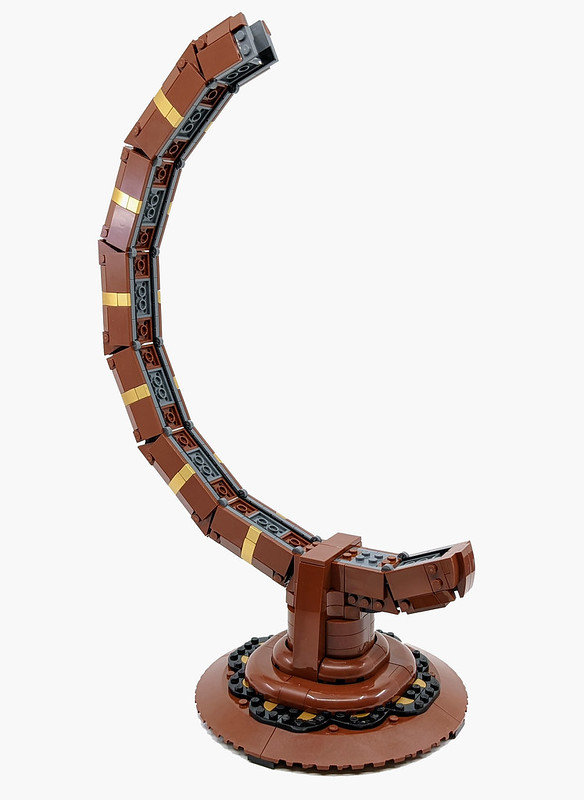
The build begins with the display stand, which is a combination of a base and a large curved arm, which acts as a connection point for the body of the globe. It’s largely made up of brown elements to represent a wooden-like finish. This is a nice link to early globes, which were often made from wood. In fact, the build of the actual globe sphere has an unexpected link back to how globes were first made. The geographical information was added to the wooden body of the globe by glueing paper maps to it. The LEGO version has panels, upon which landmass is added to represent areas of the world.
Back to the globes arm mount, which is built with a series of sections, these clip together to create the necessary curve and are secured in place with hinge plates. It’s then clad in a mix of tiles and shiny gold elements. Once the base and arm is complete you move onto the actual globe.
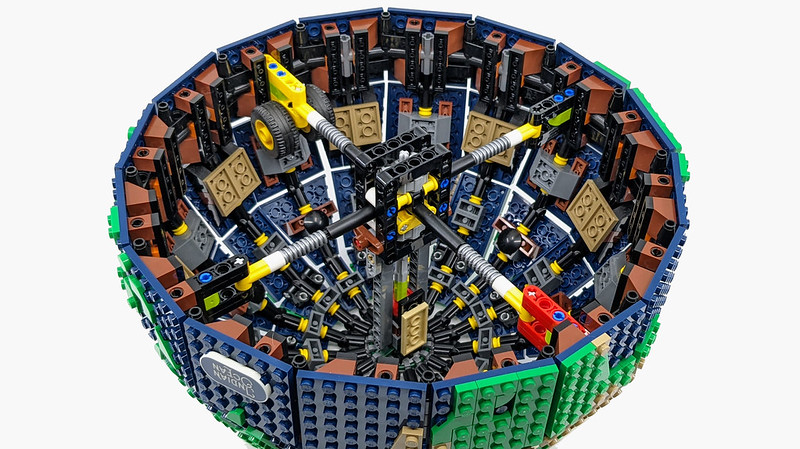
The sphere of the globe is built around a band, which is a series of 6×6 plates linked together by Technic pins. There are four points inside the band which use Technic beams. There are different colours used to act as a much-needed reference point for when you add the outer shell of the globe. They are also used to connect to a central core largely constructed from Technic pieces and rods. One point of this also includes a pair of tyres. I assume this acts as a sort of counterbalance for when the sphere of the globe is mounted at an angle on the arm. This is replicated for both halves of the globe.
But it wouldn’t be much of a globe without the actual spherical replica of the Earth. Creating curves with LEGO elements has become a little easier in recent times, but they are still not a natural fit for LEGO bricks. The way the outer shell is created and connected gives an angled but decent enough finish. The surface of the globe is created in two steps. There are two styles of surface plates, these all use dark blue plates of different sizes. The colour obviously represents the ocean, the landmass is then added on top of these plates. A mix of green, light brown and white elements are combined to craft a very simplistic mock-up of the continents. These plate wings use a Technic heavy arm, with the plates connected on top of them. At one end of these arms is a Technic axis pin and at the opposite end a spanner clip. These allow you to connect the plates to the band and core sections. The axis pin slots into the band section and the spanner clips connect to the central core section. With a large steering wheel making the perfect connection point. Although these sections are a little repetitive, it’s a necessary series of steps to achieve the required shape of the globe.
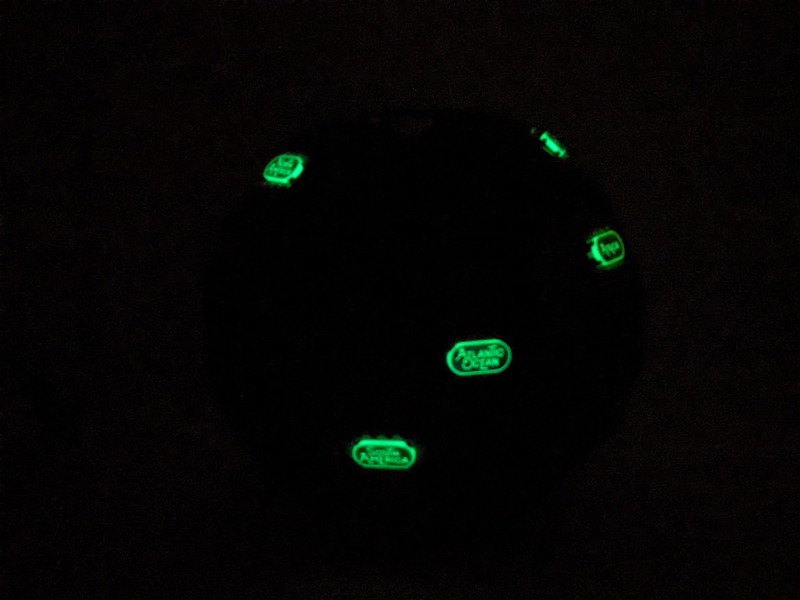
As well as showing the landmass of the Earth, the outer details on the sphere also include a compass and a little ship. These were often added to globes to make them look a little more pretty or to fill those large spans of the ocean. Although the landmass isn’t massively detailed you can work out what is where, but if you need a little help there are various printed plates dotted about the globe showing the names of oceans and continents. These are all glow-in-the-dark elements, which seems a little pointless but still cool to have. It may not be super detailed but this is a display piece not an educational tool or a means to help you circumnavigate the world.
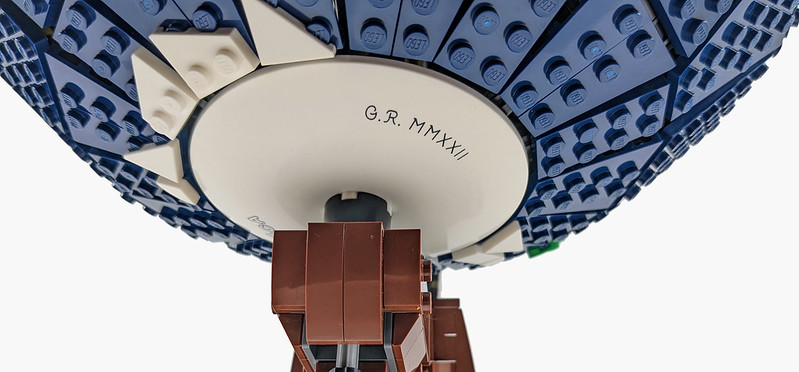
With the plates, all connected the globe is nearly complete. To find it off the ice caps are added by connecting two large disc elements. Not only do these represent the icy top and tail on the Earth, but they also cover up the connection points of the plates and help to connect the completed globe to the arm and base, plus this is where a nod to the fan designer can be found with the date marking. The vastness of the globe is simply anchored to the arm with a couple of Technic rods. There’s a little extra building to be done around the upper section of arms once the globe is mounted but adding the two pieces together is surprisingly simple.
Once the Globe body is fully connected to the arm, there are a few extra pieces to add to the base including a printed nameplate. The end result is mighty impressive. LEGO Ideas is truly a showcase for what is possible with LEGO pieces and The Globe is another great example of that. The build is very unique but can certainly become a little repetitive in places. Yet, the end result is certainly worth it. The size of The Globe was certainly unexpected, I thought it to be smaller but it’s almost one-to-one with standard terrestrial globes.
Review Round-up
Another excellent showcase of not only fan creation but for LEGO building in general. The set is an interesting build even if it’s a little repetitive in places but the end result is the most impressive thing about The Globe.
For
+ Looks amazing
+ Printed Pieces
+ Glow-in-the-dark elements
+ It spinsAgainst
– A little repetitive in places
– Some pieces of Landmass look odd
Coming Soon: UKIrelandUSCanadaGermanyDenmarkAustraliaNew Zealand


